RIFF JTAG Manager v1.71 released

JTAG Manager 1.71
—————————
– Firmware update bugs are fixed. Those could cause box not detection errors during firmware update procedure when box is switched from firmware mode into bootcore mode and vice versa
– Eight new boot mode templates are added to “Set Boot Operation Mode” feature (eMMC/SD Anvanced dialog from eMMC/SD Access page):
Broadcom Boot Config, Exynos (RSTn OFF) Boot Config, Exynos (RSTn ON) Boot Config, Hi-Silicon Boot Config, Mediatek Boot Config, Qualcomm 1 Boot Config, Qualcomm 2 Boot Config, Spreadtrum Boot Config


DirectProgramming.dll Version 1.05

————————————-
– Plugin is upgraded to be compatible with JTAG Manager 1.70 and on.


RIFF License server v1.39

– Fixed update procedure for box is bootcore mode (“firmware update failed” problem)
– Overall stability improved
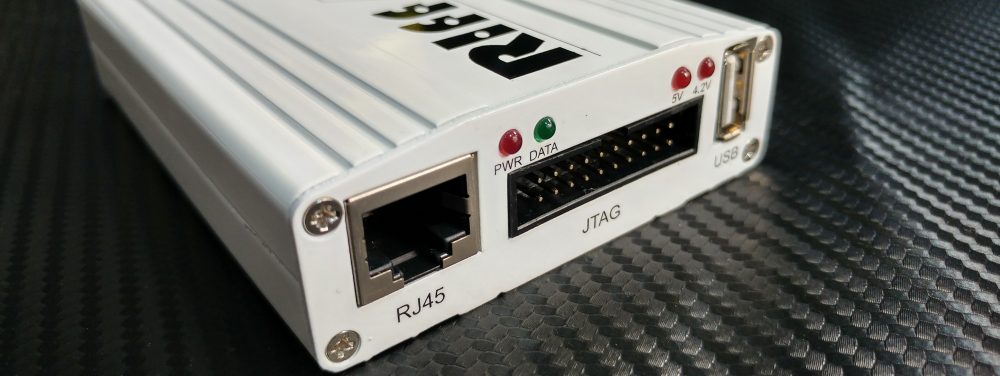
RIFF Box Firmware v1.45, RIFF JTAG Manager v1.69 eMMC Plugin v3.02 released

RIFF Box Firmware v1.45
—————————
– Added MassStorage Mode for RIFFBOX2

RIFF JTAG Manager v1.69
—————————
– Fixed the bug for General Purpose Partition Sizes
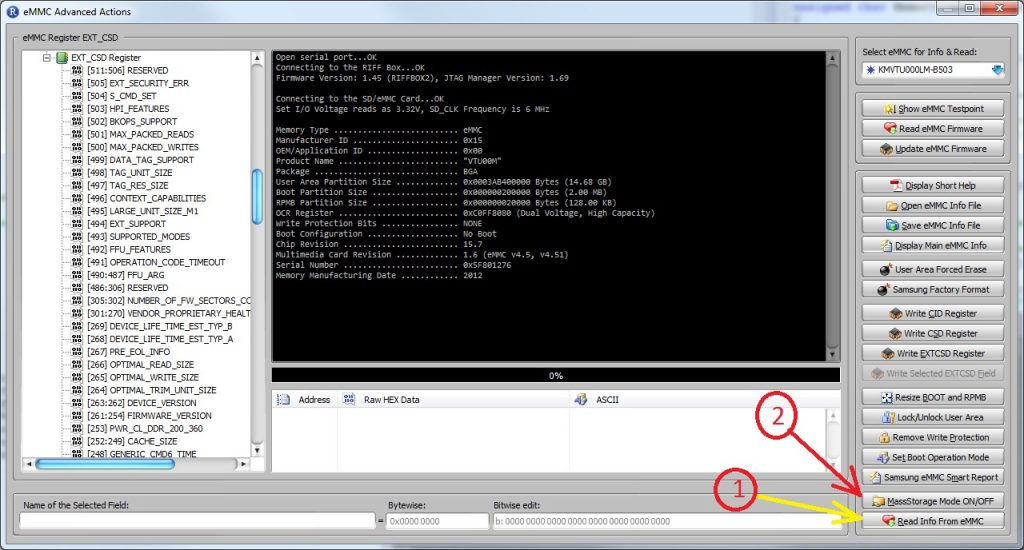
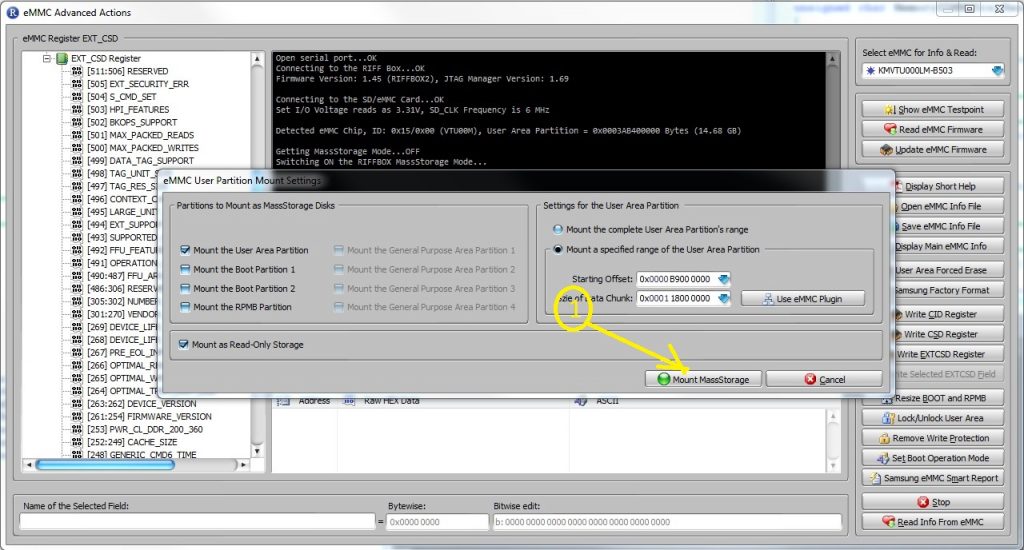
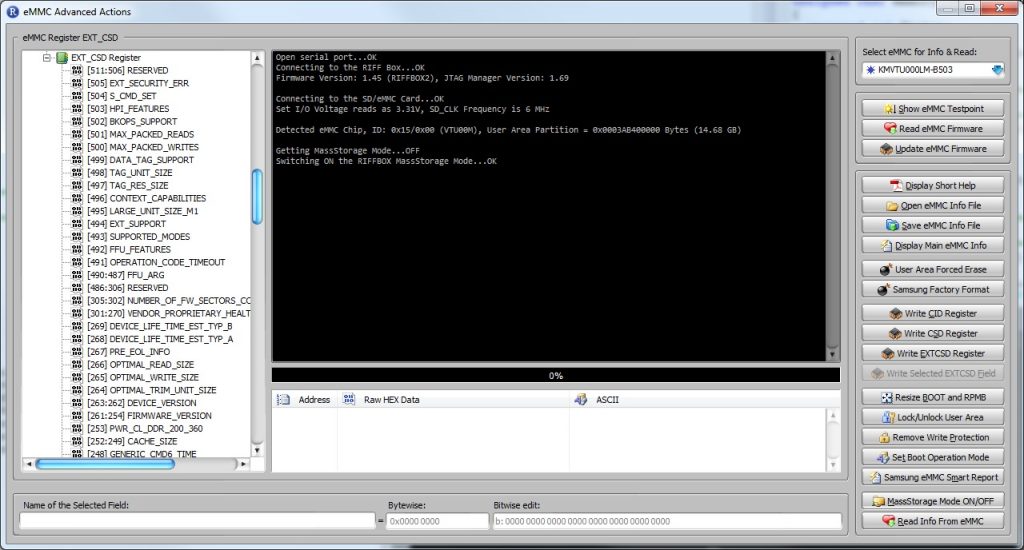
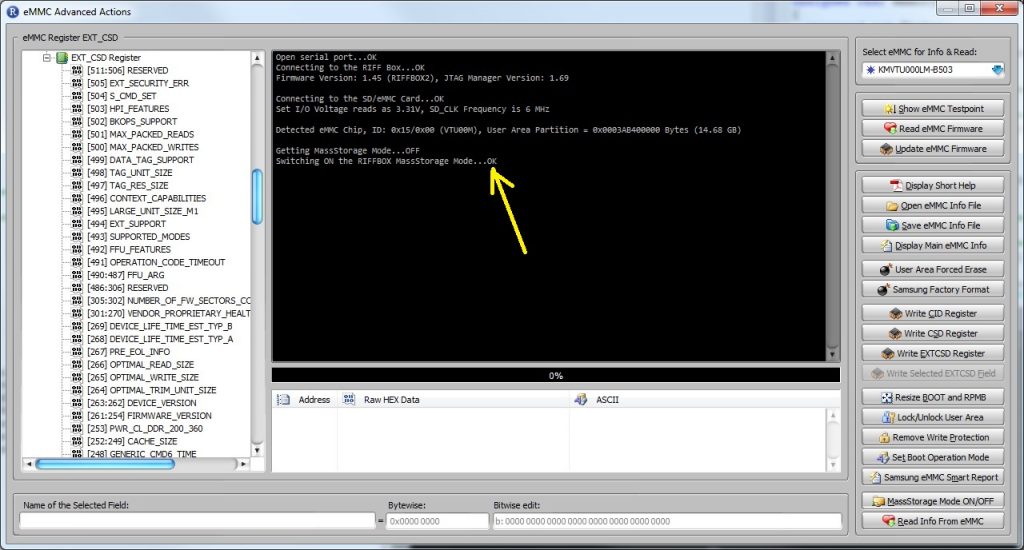
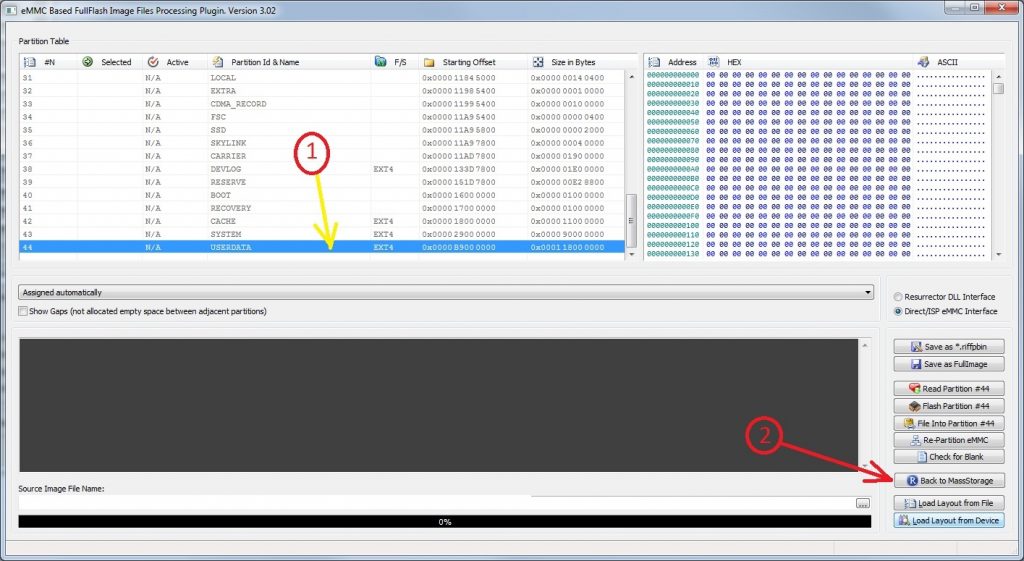
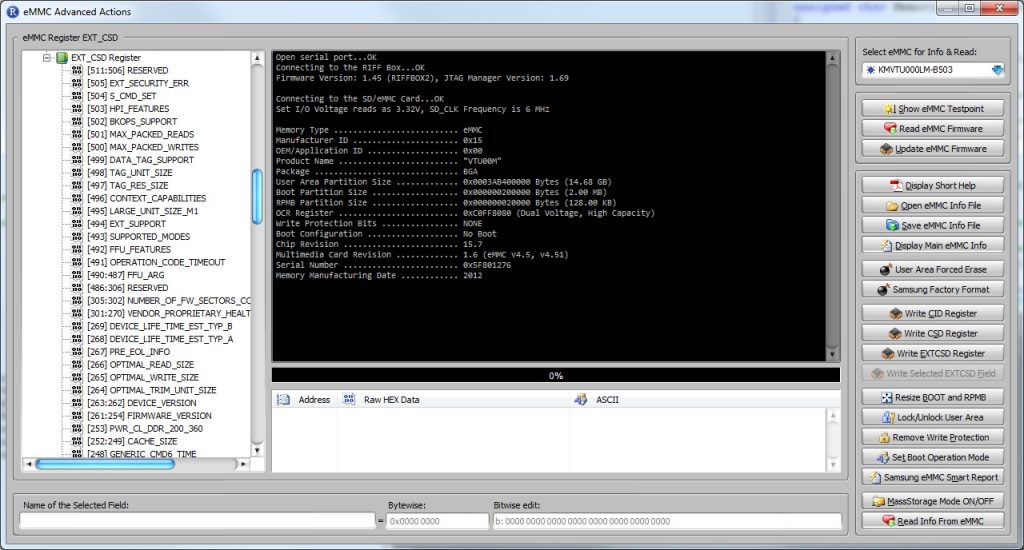
– Added feature to switch ON/OFF the MassStorage Mode. For this, please connect an eMMC (either via Direct or ISP interface),
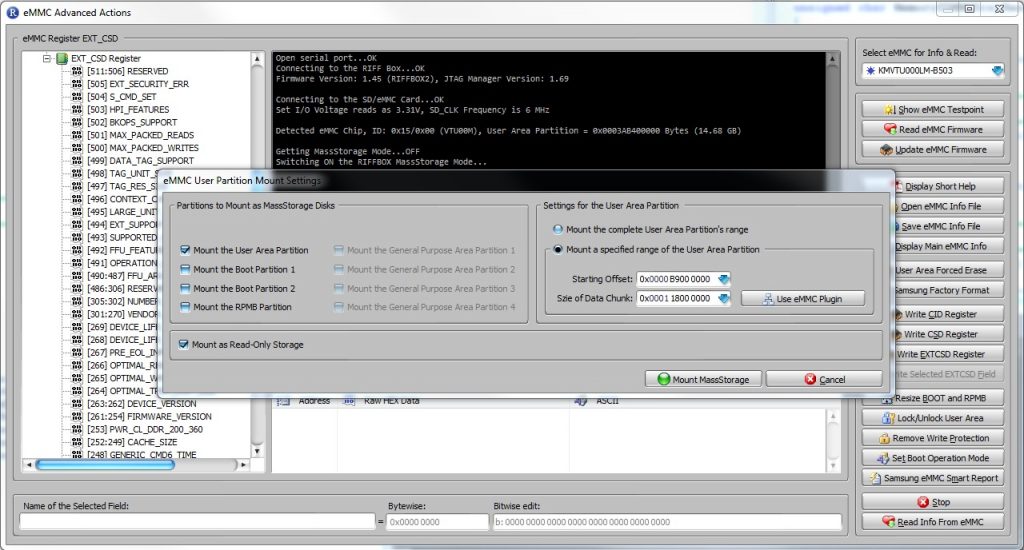
make sure it is detected (on the “eMMC/SD Card” page), and on the ‘eMMC/SD Advanced’ dialog click the ‘MassStorage Mode ON/OFF’ button to setup which partitions are to be mounted.
Please note, for stable connection, first of all do reads on the “eMMC/SD Card” page to adjust stable Frequency, BusWidth and Voltage.
After you click “MassStorage Mode ON/OFF” button, current settings for Voltage, Frequency, Bus Width will be written into RIFFBOX non-volatile memory,
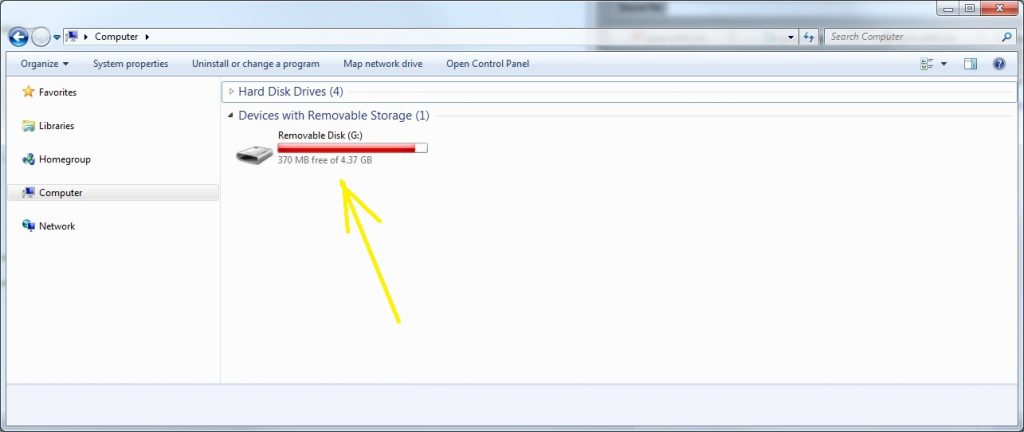
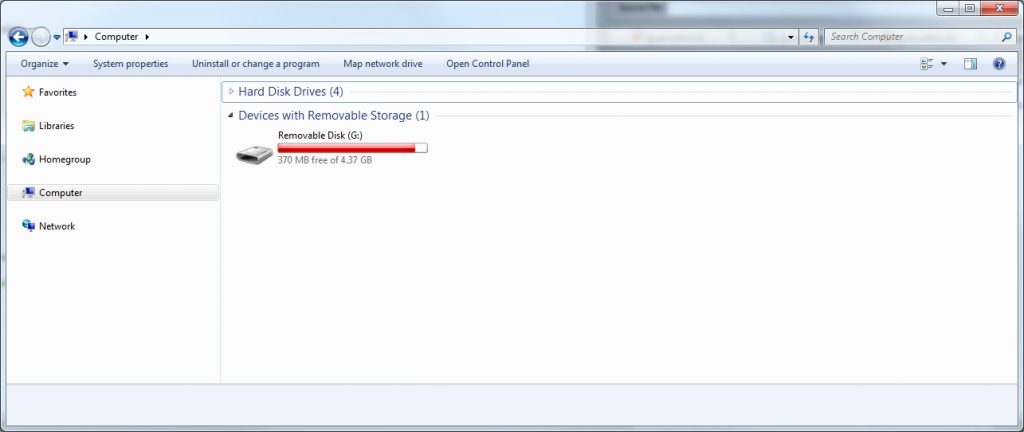
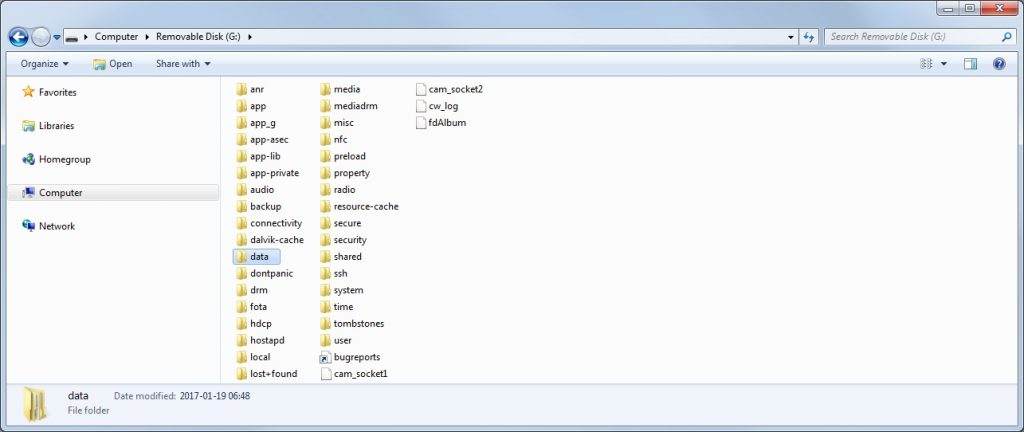
and while the MassStorage mode is ON, upon each connection to USB the RIFFBOX will additionally to normal Control interface enumerate the MassStorage Disks (as if a Flash Stick is connected to PC)

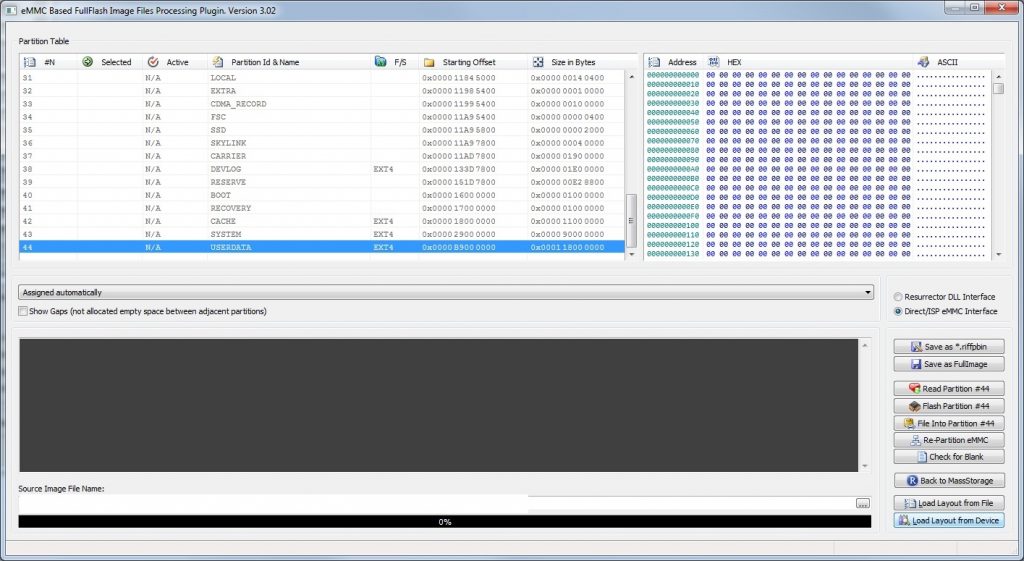
eMMC Partition Table FullFlash Image Files Processing Plugin (eMMCDiskPartitions.dll) v3.02
————————————-
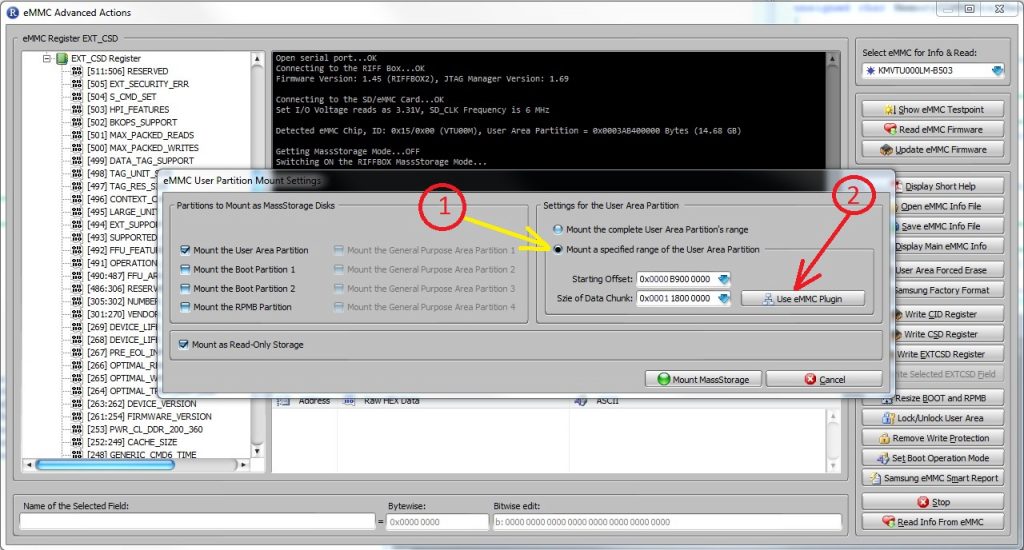
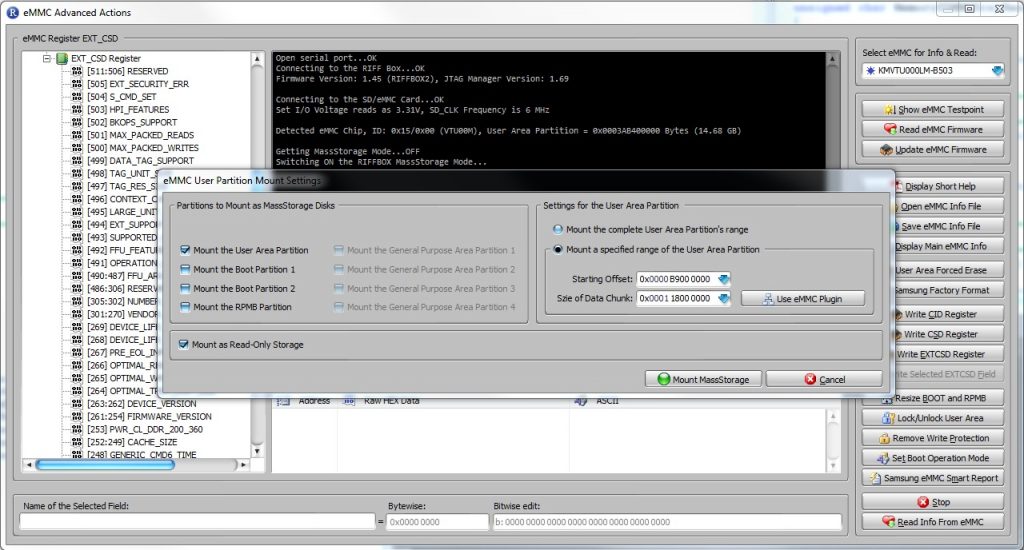
– Added support for User Area Partition bounds selection from the JTAG Manager’s MassStorage settings dialog
– Added file system detection: the plugin analyzes the partition’s data structure to autodetect what file system (if any) is used. The result is displayed in the new “F/S” row
..

To mount EXT/x partitions You should install EXT FS driver from here:

http://www.ext2fsd.com

You can read more details at official support forum:
http://www.unlockforum.com/showthread.php/riff-box-firmware-v1-45-riff-jtag-manager-31615.html


RIFF Box JTAG Manager v1.68, RIFF Box firmware v1.44 released

JTAG Manager 1.68
—————————
– Added option “Forced eMMC Samsung Mode” to the “Write CID Register” operation, so the Samsung eMMC chips with not valid Manufacturer ID field (the valid one is 0x15) could be processed.

Firmware 1.44
—————————
– Fixed Hynix (and possibly other non-Samsung eMMC chips) bug which caused erase of chip contents during init stage (“Check eMMC/SD Card” button);
– Changed eMMC autodetection algo for Samsung chips. Now a simple check of Manufacturer ID is used (note, the Samsung eMMC’s Manufacturer ID = 0x15)
Please note, currently is supported eMMC CID Register Write operation for Samsung chips. Thus, for Samsung eMMC it is possible to change Manufacturer ID byte.
In case Manufacturer ID is not equal 0x15, all extended Samsung eMMC’s functionality will be disabled (Write CID,CSD, Read/Write eMMC firmware, etc).
To enable it, use “Write CID Register” operation with the forced Samsung Mode checkbox checked to write the 0x15 value back to the Manufacturer ID field.

RIFF JTAG Manager v1.67, RIFF Box Firmware v1.43

JTAG Manager 1.67
—————————
– Fixed bug (which is related to RIFFBOX2 only), which caused box connection error, after this operation: “Setting new JTAG/eMMC License to the RIFFBOX.”

RIFF Box Firmware v1.43
—————————

– Fixed bug related to RIFF Box v1 eMMC detection
– Fixed bug related to RIFF Box v2 USB 2.0 ports enumeration

New RIFF Box v2 drivers:
—————————-
– Drivers from year 2014 (x86 and x64)

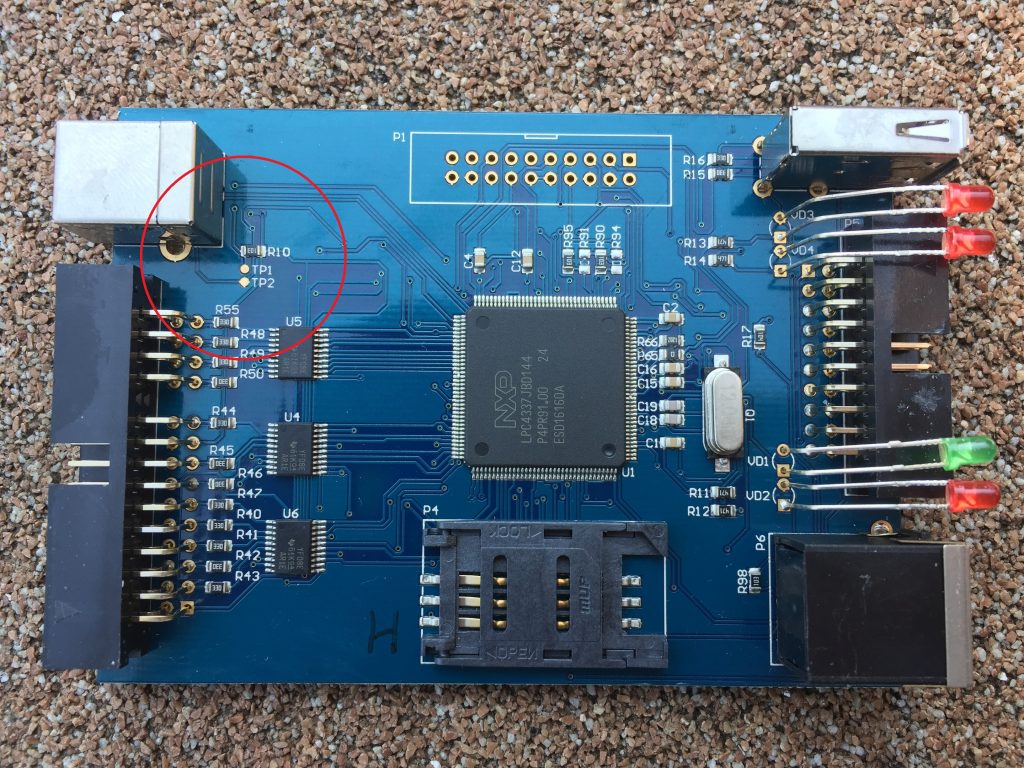
Instructions for users with V2 box and “Device cannot start, error code 10” problem:

Method 1:
– Disconnect RIFF Box v2 from USB port
– Open box housing and take PCB out
– Connect TP1 to TP2 using tweezers,
– Connect USB cable to Box and PC
– Disconnect TP-s
– Launch JTAG Manager (any version from 1.65 and up)
– Perform Firmware Update as requested

After You connect TP-s and USB cable, box will enumerate in bootloader mode. RIFF Update Port driver is required (like allways during firmware update) and Recovery firmware will be flashed.
After this, normal Firmware Update procedure will follow and You can use RIFF Box on any USB port (2.0 or 3.0).

Method 2:

– Find working USB 3.0 port (By working means that LPCDevice driver works)
– Update box to V1.43 firmware
.

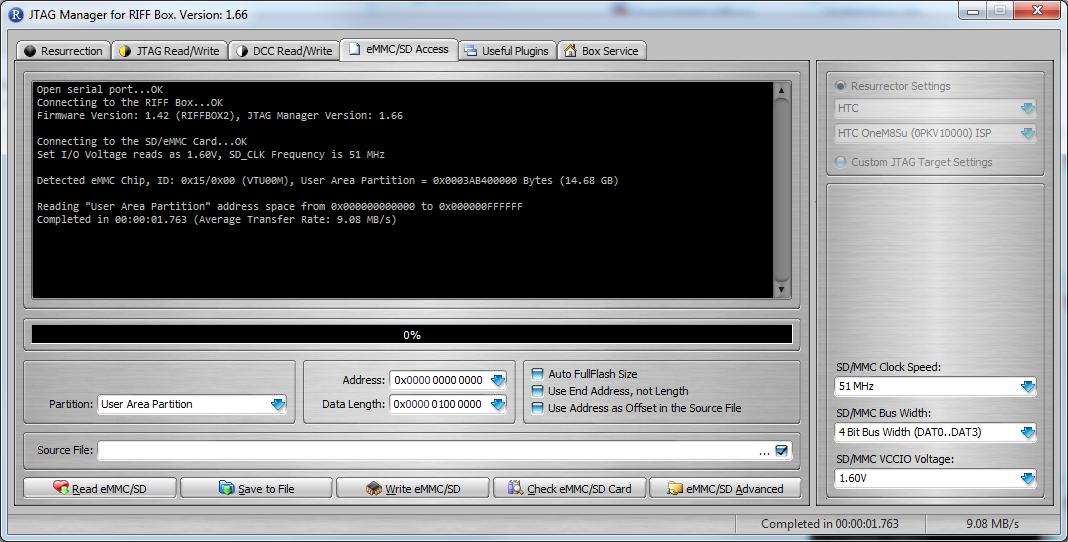
RIFF JTAG Manager v1.66, RIFF II Firmware v1.42 (10x faster)

Hello,
Please read this carefully if You are RIFF Box v2 user:RIFF JTAG Manager 1.66
—————————
– RIFFBOX2 support for new connection mode is added (for new Drivers)
– Due to new drivers Read/Write speeds via eMMC interface increased 10 times and more
– Read/Write speed is now shown in MB/s
– Firmware Update process adjusted for slow networks (Indonesia, Bangladesh, India . . .)


RIFF Box Firmware v1.42

—————————
– RIFFBOX connection mode is optimized for better speed, it is no more the CDC.
The data transfer speeds are increased more than 10 times.
– Fixed bug in handling the erroneous situations during eMMC data read operations.

RIFF Box v2 users:

1. Download new files from server (JTAG Manager and “New Drivers”)
2. Click “Firmware Update” and wait for process to be finished,
(Update port driver remains old ! ! !)
3. Install new drivers from “New Driver” folder in JTAG Manager install dir.

New driver, together with new firmware will dramatically increase performances with eMMC chips and SD cards.
Theoretical speed is up to 18MB/s using 4bit bus width.
In practice it can depend on eMMC chip model but even for oldest chips it’s near 10MB/s.

RIFF Box v1 users don’t need to install new driver, as it cannot be implemented for old hardware for now.

__________________

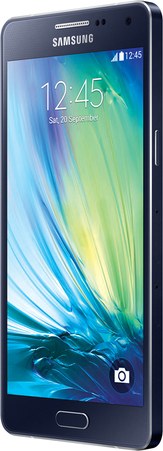
RIFF JTAG – Samsung SM-A500F Galaxy A5 LTE Boot repair supported

Repairing bricked Samsung A500F via ISP connection is easy with the RIFF Box.

To resurrect Samsung A500F via ISP connection:

  • Get access to Samsung A500F board (PCB);
  • Check schematics picture for solder positions of CLK, DAT0, CMD and GND signals;
  • Remove (de-solder) the CLK resistor (30R);
  • Solder CLK, DAT0, CMD and GND wires to the specified pads on the PCB;
  • Attach battery
  • Connect USB Data cable (in some cases also attach battery);
  • Make sure Samsung A500F ISP is selected in the list of models;
  • Click Resurrect button;
  • Wait till software signals a successful operation completion;
  • Disconnect USB cable and battery, de-solder wires and solder back the CLK resistor;

Now phone is in bootable condition, that is, even if it does not start up normally you can flash it using known flashing methods.
.

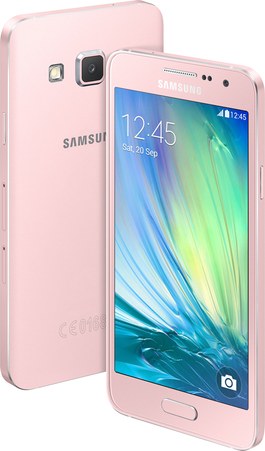
RIFF JTAG – Samsung SM-A300F Galaxy A3 LTE Boot repair supported

Repairing bricked Samsung A300F via ISP connection is easy with the RIFF Box.

To resurrect Samsung A300F via ISP connection:

  • Get access to Samsung A300F board (PCB);
  • Check schematics picture for solder positions of CLK, DAT0, CMD and GND signals;
  • Remove (de-solder) the CLK resistor (30R);
  • Solder CLK, DAT0, CMD and GND wires to the specified pads on the PCB;
  • Attach battery
  • Connect USB Data cable (in some cases also attach battery);
  • Make sure Samsung A300F ISP is selected in the list of models;
  • Click Resurrect button;
  • Wait till software signals a successful operation completion;
  • Disconnect USB cable and battery, de-solder wires and solder back the CLK resistor;

Now phone is in bootable condition, that is, even if it does not start up normally you can flash it using known flashing methods.
.

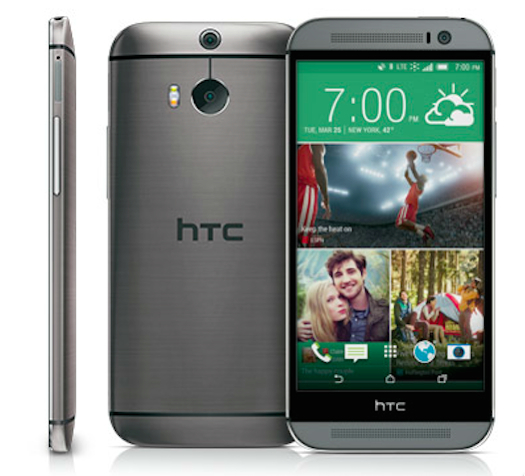
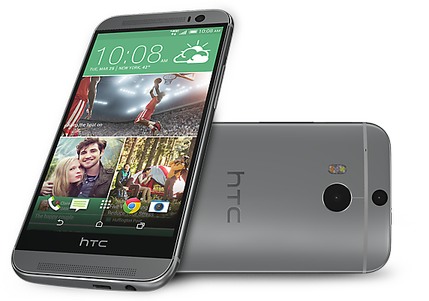
RIFF JTAG – HTC One M8 ULCA (AT&T) Boot repair supported

Repairing bricked HTC One M8Ulca (0P6B12000) via ISP connection is easy with the RIFF Box.
Additionally to HBOOT and Radio zones, the zone which contains Model ID is re-flashed too. Thus after resurrection phone will have Model ID = ‘0P6B12000’.

To resurrect HTC One M8Ulca (0P6B12000) via ISP connection:

  • Get access to HTC One M8Ulca (0P6B12000) board (PCB);
  • Check schematics picture for solder positions of CLK, DAT0, CMD and GND signals;
  • Remove (de-solder) the CLK resistor;
  • Solder CLK, DAT0, CMD and GND wires to the specified pads on the PCB;
  • Attach battery
  • Connect USB Data cable;
  • Make sure HTC One M8Ulca (0P6B12000) ISP is selected in the list of models;
  • Click Resurrect button;
  • Wait till software signals a successful operation completion;
  • Disconnect USB cable and battery, de-solder wires and solder back the CLK resistor;

Now phone is in bootable condition, that is, even if it does not start up normally you can flash it using known flashing methods.
.

RIFF JTAG – HTC ONE M8w 4G LTE Boot repair supported

Repairing bricked HTC One M8Wlv (0P6B20000) via ISP connection is easy with the RIFF Box.
Additionally to HBOOT and Radio zones, the zone which contains Model ID is re-flashed too. Thus after resurrection phone will have Model ID = ‘0P6B20000’.

To resurrect HTC One M8Wlv (0P6B20000) via ISP connection:

  • Get access to HTC One M8Wlv (0P6B20000) board (PCB);
  • Check schematics picture for solder positions of CLK, DAT0, CMD and GND signals;
  • Remove (de-solder) the CLK resistor;
  • Solder CLK, DAT0, CMD and GND wires to the specified pads on the PCB;
  • Attach battery
  • Connect USB Data cable;
  • Make sure HTC One M8Wlv (0P6B20000) ISP is selected in the list of models;
  • Click Resurrect button;
  • Wait till software signals a successful operation completion;
  • Disconnect USB cable and battery, de-solder wires and solder back the CLK resistor;

Now phone is in bootable condition, that is, even if it does not start up normally you can flash it using known flashing methods.
.